一个PyQt6 界面代码
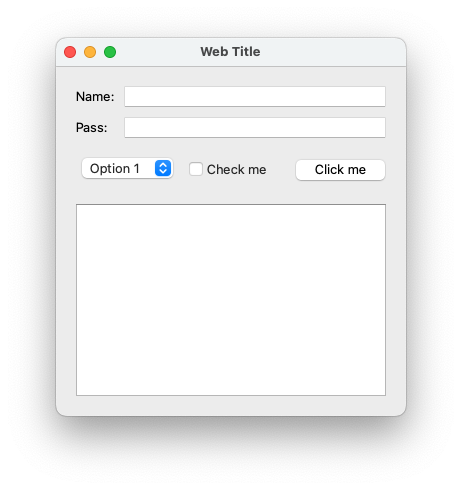
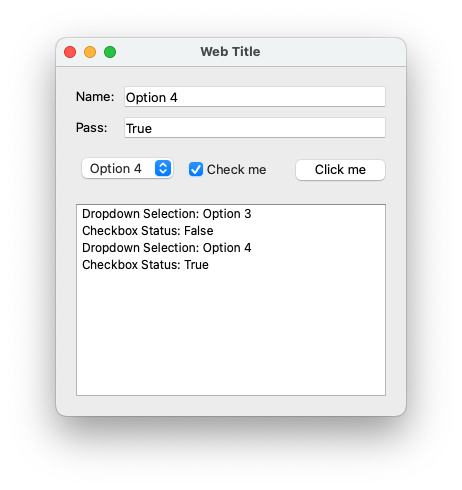
from PyQt6.QtWidgets import QApplication, QWidget, QVBoxLayout, QHBoxLayout, QLabel, QLineEdit, QComboBox, QCheckBox, QPushButton, QListWidget

class MyWindow(QWidget):
    def __init__(self):
        super().__init__()

        self.setWindowTitle("Web Title")
        self.setFixedWidth(350)

        self.layout = QVBoxLayout(self)

        self.row1 = QHBoxLayout()
        self.label1 = QLabel("Name: ")
        self.label1.setFixedWidth(40)
        self.textbox1 = QLineEdit()
        # self.textbox1.setFixedWidth(100)
        self.row1.addWidget(self.label1)
        self.row1.addWidget(self.textbox1)

        self.row2 = QHBoxLayout()
        self.label2 = QLabel("Pass: ")
        self.label2.setFixedWidth(40)
        self.textbox2 = QLineEdit()
        # self.textbox2.setFixedWidth(100)
        self.row2.addWidget(self.label2)
        self.row2.addWidget(self.textbox2)

        self.row3 = QHBoxLayout()
        self.dropdown = QComboBox()
        self.dropdown.addItems(["Option 1", "Option 2", "Option 3", "Option 4"])
        self.checkbox = QCheckBox("Check me")
        self.button = QPushButton("Click me")
        self.row3.addWidget(self.dropdown)
        self.row3.addWidget(self.checkbox)
        self.row3.addWidget(self.button)

        self.listbox = QListWidget()

        self.layout.addLayout(self.row1)
        self.layout.addLayout(self.row2)
        self.layout.addLayout(self.row3)
        self.layout.addWidget(self.listbox)

        self.button.clicked.connect(self.on_button_click)

    def on_button_click(self):
        selected_option = self.dropdown.currentText()
        checked_state = self.checkbox.isChecked()

        self.textbox1.setText(selected_option)
        self.textbox2.setText(str(checked_state))

        self.listbox.addItem("Dropdown Selection: " + selected_option)
        self.listbox.addItem("Checkbox Status: " + str(checked_state))


if __name__ == "__main__":
    app = QApplication([])
    window = MyWindow()
    window.show()
    app.exec()